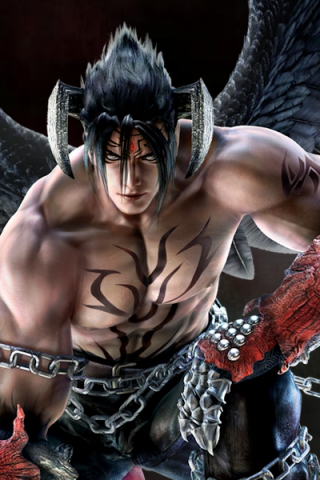
Devil Jin (Tekken 6): Difference between revisions
From Dark Upper Wiki
More actions
No edit summary |
No edit summary |
||
| (11 intermediate revisions by 2 users not shown) | |||
| Line 1: | Line 1: | ||
<div id="audiences" class="mainpage_row"> | <div id="audiences" class="mainpage_row"> | ||
<div class="mainpage_box"> | <div class="mainpage_box"> | ||
<h1>Devil Jin | <h1>Devil Jin</h1> | ||
<div aria-hidden="true" role="presentation">[[File:deviljint6portrait.png|{{dir|{{{1|{{PAGELANGUAGE}}}}}|left|right}}|thumb|320px|Devil Jin]]</div> | <div aria-hidden="true" role="presentation">[[File:deviljint6portrait.png|{{dir|{{{1|{{PAGELANGUAGE}}}}}|left|right}}|thumb|320px|Devil Jin]]</div> | ||
Despite Mishimas being notably weaker in Tekken 6, Devil Jin remains a top tier with most of the tools would want in a character. | |||
== Legend == | == Legend == | ||
| Line 17: | Line 17: | ||
These are the main moves you will want to use in a match. | These are the main moves you will want to use in a match. | ||
{{MoveCard | {{MoveCard | ||
|title= | |title= | ||
|image= | |image= | ||
|startup= | |startup= | ||
|startup-color= | |startup-color= | ||
|hitlevel= | |hitlevel= | ||
|properties= | |properties= | ||
| Line 37: | Line 35: | ||
<h1>Stance Moves</h1> | <h1>Stance Moves</h1> | ||
This is what you can do out of your stances. | This is what you can do out of your stances. | ||
<h1>Combos</h1> | <h1>Combos</h1> | ||
Combo resources can be found [https:// | Combo resources can be found [https://docs.google.com/spreadsheets/u/0/d/e/2PACX-1vSrQDVLlXLCnW7Bo1LnF2yBjObEBWady8sfX4Fz8j2lUIpAINFQWa0f5-qBLUR8QMcjEX5NtCx1pgUU/pubhtml?pli=1#gid=1788384304 here]. | ||
<h1>Stance Transitions</h1> | <h1>Stance Transitions</h1> | ||
| Line 70: | Line 52: | ||
{{StanceRow | input = f+4,3,u~ | stance = FLY}} | {{StanceRow | input = f+4,3,u~ | stance = FLY}} | ||
}} | }} | ||
| valign="top" | | |||
{{StanceTable | {{StanceTable | ||
| rows = | | rows = | ||
| Line 81: | Line 64: | ||
{{PunishTable | {{PunishTable | ||
| rows = | | rows = | ||
{{PunishRow | frames = | {{PunishRow | frames = 10 | standing = 1,1,2 | crouching = d+1}} | ||
{{PunishRow | frames = | {{PunishRow | frames = 11 | standing = 1,1,2 | crouching = ws 4}} | ||
{{PunishRow | frames = | {{PunishRow | frames = 12 | standing = b+1,2 | crouching = ws 4}} | ||
{{PunishRow | frames = 13 | standing = df+4,4 | crouching = ws 1,2}} | |||
{{PunishRow | frames = 14 | standing = f,n,d,df+2 (perfect input) | crouching = ws 1,2 }} | |||
{{PunishRow | frames = 15 | standing = d+3+4 | crouching = ws 2}} | |||
{{ | |||
| | |||
| | |||
| | |||
| | |||
| | |||
| | |||
| | |||
| | |||
| | |||
}} | }} | ||
Latest revision as of 10:54, 25 December 2025
Devil Jin
Despite Mishimas being notably weaker in Tekken 6, Devil Jin remains a top tier with most of the tools would want in a character.
Legend
- cd: Crouch Dash
- FLY: Fly
Starter Guide
Key Moves
These are the main moves you will want to use in a match.
[[File:|center|link=]]
| Startup | Hit Level | On Block | On Hit | On Counter |
|---|---|---|---|---|
Stance Moves
This is what you can do out of your stances.
Combos
Combo resources can be found here.
Stance Transitions
How to get into stance.
|
|
Punishers
Use these moves when you have at least a +10 frame advantage to punish your opponent.
| Frames | Standing | Crouching |
|---|---|---|
| 10 | 1,1,2 | d+1 |
| 11 | 1,1,2 | ws 4 |
| 12 | b+1,2 | ws 4 |
| 13 | df+4,4 | ws 1,2 |
| 14 | f,n,d,df+2 (perfect input) | ws 1,2 |
| 15 | d+3+4 | ws 2 |

