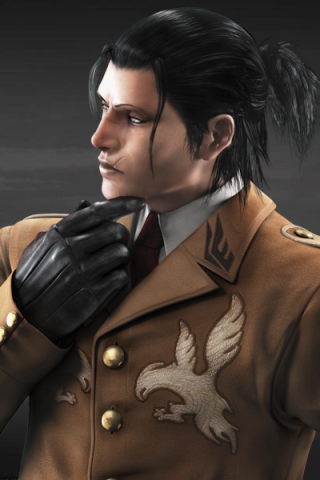
Dragunov (Tekken Dark Resurrection): Difference between revisions
From Dark Upper Wiki
More actions
Created page with "<div id="audiences" class="mainpage_row"> <div class="mainpage_box"> <h1>Dragunov (Tekken Dark Resurrection)</h1> <div aria-hidden="true" role="presentation">{{dir|{{{1|{{PAGELANGUAGE}}}}}|left|right}}|thumb|320px|Sergei Dragunov</div> Overview here == Legend == * '''1''': Stance 1 * '''2''': Stance 2 * '''3''': Stance 3 * '''4''': Stance 4 <div style="clear: both;"></div> <h1>Starter Guide</h1> <h2>Key Moves</h2> These are the main moves you..." |
No edit summary |
||
| (2 intermediate revisions by the same user not shown) | |||
| Line 3: | Line 3: | ||
<h1>Dragunov (Tekken Dark Resurrection)</h1> | <h1>Dragunov (Tekken Dark Resurrection)</h1> | ||
<div aria-hidden="true" role="presentation">[[File: | <div aria-hidden="true" role="presentation">[[File:dragt5drportrait.png|{{dir|{{{1|{{PAGELANGUAGE}}}}}|left|right}}|thumb|320px|Sergei Dragunov]]</div> | ||
Overview here | Overview here | ||
== Legend == | == Legend == | ||
* ''' | * '''cd''': Crouch Dash | ||
<div style="clear: both;"></div> | <div style="clear: both;"></div> | ||
| Line 60: | Line 58: | ||
<h1>Combos</h1> | <h1>Combos</h1> | ||
Combo resources can be found [https://linkhere here]. | Combo resources can be found [https://linkhere here]. | ||
<h1>Punishers</h1> | <h1>Punishers</h1> | ||
| Line 92: | Line 64: | ||
{{PunishTable | {{PunishTable | ||
| rows = | | rows = | ||
{{PunishRow | frames = | standing = | {{PunishRow | frames = 10 | standing = 1,3 | crouching = FC d+1}} | ||
{{PunishRow | frames = | {{PunishRow | frames = 11 | standing = 1,3 | crouching = ws 4}} | ||
{{PunishRow | frames = | {{PunishRow | frames = 12 | standing = 4 | crouching = ws 1+2}} | ||
{{PunishRow | frames = 14 | standing = f+4,4 | crouching = ws 1+2}} | |||
{{PunishRow | frames = 15 | standing = df+2 | crouching = ws 2}} | |||
}} | }} | ||
Latest revision as of 16:43, 21 September 2025
Dragunov (Tekken Dark Resurrection)
Overview here
Legend
- cd: Crouch Dash
Starter Guide
Key Moves
These are the main moves you will want to use in a match.
! startup color should be left white, rest should be green if +, white from 0 to -9, orange from -10 to -14 and red for -15 and below
[[File:|center|link=]]
| Startup | Hit Level | On Block | On Hit | On Counter |
|---|---|---|---|---|
! if not applicable, delete this section
Stance Moves
This is what you can do out of your stances.
[[File:|center|link=]]
| Startup | Hit Level | On Block | On Hit | On Counter |
|---|---|---|---|---|
Combos
Combo resources can be found here.
Punishers
Use these moves when you have at least a +10 frame advantage to punish your opponent.
| Frames | Standing | Crouching |
|---|---|---|
| 10 | 1,3 | FC d+1 |
| 11 | 1,3 | ws 4 |
| 12 | 4 | ws 1+2 |
| 14 | f+4,4 | ws 1+2 |
| 15 | df+2 | ws 2 |
Plus on block moves
| Startup | Hit Level | Properties | On Block | On Hit | On Counter |
|---|---|---|---|---|---|
Neutral on block moves
| Startup | Hit Level | Properties | On Block | On Hit | On Counter |
|---|---|---|---|---|---|
Safe on block moves
| Startup | Hit Level | Properties | On Block | On Hit | On Counter |
|---|---|---|---|---|---|
Unsafe on block moves
These are moves that can be punished by your opponent if blocked.
Launch punishable moves
These are moves where you can be launched by your opponent if blocked.

