
King (Tekken 6): Difference between revisions
From Dark Upper Wiki
More actions
Created page with "test" |
No edit summary |
||
| (28 intermediate revisions by the same user not shown) | |||
| Line 1: | Line 1: | ||
<div id="audiences" class="mainpage_row"> | |||
<div class="mainpage_box"> | |||
<h1>King II</h1> | |||
<div aria-hidden="true" role="presentation">[[File:kingt6portrait.png|{{dir|{{{1|{{PAGELANGUAGE}}}}}|left|right}}|thumb|320px|King II]]</div> | |||
King is a grappler with an amazing throw game with very strong oki and 50/50s but has bad whiff punishment and weak pokes. | |||
== Legend == | |||
* '''cd''': Crouch Dash | |||
* '''JAG''': Jaguar Step | |||
* '''GS''': Giant Swing | |||
* '''SW''': Shining Wizard | |||
<div style="clear: both;"></div> | |||
<h1>Starter Guide</h1> | |||
<h2>Key Moves</h2> | |||
These are the main moves you will want to use in a match. | |||
{{MoveCard | |||
|title= | |||
|image= | |||
|startup= | |||
|startup-color=white | |||
|hitlevel= | |||
|properties= | |||
|onblock= | |||
|onblock-color= | |||
|onhit= | |||
|onhit-color= | |||
|oncounter= | |||
|oncounter-color= | |||
|description= | |||
}} | |||
<h1>Stance Moves</h1> | |||
This is what you can do out of your stances. | |||
{{MoveCard | |||
|title=JAG 1 | |||
|image= | |||
|startup= | |||
|startup-color=white | |||
|hitlevel= | |||
|properties= | |||
|onblock= | |||
|onblock-color= | |||
|onhit= | |||
|onhit-color= | |||
|oncounter= | |||
|oncounter-color= | |||
|description= | |||
}} | |||
{{MoveCard | |||
|title=JAG 2 | |||
|image= | |||
|startup= | |||
|startup-color=white | |||
|hitlevel= | |||
|properties= | |||
|onblock= | |||
|onblock-color= | |||
|onhit= | |||
|onhit-color= | |||
|oncounter= | |||
|oncounter-color= | |||
|description= | |||
}} | |||
{{MoveCard | |||
|title=JAG 3 | |||
|image= | |||
|startup= | |||
|startup-color=white | |||
|hitlevel= | |||
|properties= | |||
|onblock= | |||
|onblock-color= | |||
|onhit= | |||
|onhit-color= | |||
|oncounter= | |||
|oncounter-color= | |||
|description= | |||
}} | |||
{{MoveCard | |||
|title=JAG 2+3(1+4) | |||
|image= | |||
|startup= | |||
|startup-color=white | |||
|hitlevel=H | |||
|properties=Chain grab [https://darkupper.com/King_(Tekken_6)#Cobra_Clutch (Cobra Clutch)] | |||
|onblock= | |||
|onblock-color= | |||
|onhit= | |||
|onhit-color= | |||
|oncounter= | |||
|oncounter-color= | |||
|description= | |||
}} | |||
{{MoveCard | |||
|title=JAG 4 | |||
|image= | |||
|startup= | |||
|startup-color=white | |||
|hitlevel= | |||
|properties= | |||
|onblock= | |||
|onblock-color= | |||
|onhit= | |||
|onhit-color= | |||
|oncounter= | |||
|oncounter-color= | |||
|description= | |||
}} | |||
{{MoveCard | |||
|title=JAG df+4 | |||
|image= | |||
|startup= | |||
|startup-color=white | |||
|hitlevel= | |||
|properties= | |||
|onblock= | |||
|onblock-color= | |||
|onhit= | |||
|onhit-color= | |||
|oncounter= | |||
|oncounter-color= | |||
|description= | |||
}} | |||
{{MoveCard | |||
|title=cd 4 | |||
|image= | |||
|startup= | |||
|startup-color=white | |||
|hitlevel= | |||
|properties= | |||
|onblock= | |||
|onblock-color= | |||
|onhit= | |||
|onhit-color= | |||
|oncounter= | |||
|oncounter-color= | |||
|description= | |||
}} | |||
{{MoveCard | |||
|title=cd 1+2 | |||
|image= | |||
|startup= | |||
|startup-color=white | |||
|hitlevel= | |||
|properties= | |||
|onblock= | |||
|onblock-color= | |||
|onhit= | |||
|onhit-color= | |||
|oncounter= | |||
|oncounter-color= | |||
|description= | |||
}} | |||
{{MoveCard | |||
|title=cd 2+3 | |||
|image= | |||
|startup= | |||
|startup-color=white | |||
|hitlevel=H | |||
|properties= | |||
|onblock= | |||
|onblock-color= | |||
|onhit= | |||
|onhit-color= | |||
|oncounter= | |||
|oncounter-color= | |||
|description=Chain grab [https://darkupper.com/King_(Tekken_6)#Standing_Heel_Hold (Standing Heel Hold)] | |||
}} | |||
{{MoveCard | |||
|title=cd 1+4 | |||
|image= | |||
|startup= | |||
|startup-color=white | |||
|hitlevel=H | |||
|properties= | |||
|onblock= | |||
|onblock-color= | |||
|onhit= | |||
|onhit-color= | |||
|oncounter= | |||
|oncounter-color= | |||
|description=Chain grab [https://darkupper.com/King_(Tekken_6)#Arm_Breaker (Arm Breaker)] | |||
}} | |||
<h1>Chain Grab Tree</h1> | |||
<h2>Arm Breaker</h2> | |||
[[File:t6kingarmbreaker.png]] | |||
{{MoveCard | |||
|title=AB to Rolling Death Cradle | |||
|image=t6kingrdc.gif | |||
|description=Example of the chain throw route | |||
}} | |||
<h2>Reverse Arm Slam</h2> | |||
[[File:t6kingreversearmsslam.png]] | |||
{{MoveCard | |||
|title=RAS to Muscle Buster | |||
|image=t6kingmb.gif | |||
|description=Example of the chain throw route | |||
}} | |||
<h2>Standing Heel Hold</h2> | |||
[[File:t6kingstandingheelhold.png]] | |||
{{MoveCard | |||
|title=SHH to Kings Bridge | |||
|image=t6kingkb.gif | |||
|description=Example of the chain throw route | |||
}} | |||
<h2>Cobra Clutch</h2> | |||
[[File:t6kingcobraclutch.png]] | |||
{{MoveCard | |||
|title=CC to Screwdriver | |||
|image= | |||
|description=Example of the chain throw route | |||
}} | |||
<h2>Reverse Special Stretch Bomb</h2> | |||
[[File:t6kingreversespecialstretchbomb.png]] | |||
{{MoveCard | |||
|title=RSSB to Giant Swing | |||
|image= | |||
|description=Example of the chain throw route | |||
}} | |||
<h2>Extras & Extensions</h2> | |||
[[File:t6kinggrabtreeextras.png]] | |||
<h1>Combos</h1> | |||
Combo resources can be found [https://docs.google.com/spreadsheets/u/0/d/e/2PACX-1vSrQDVLlXLCnW7Bo1LnF2yBjObEBWady8sfX4Fz8j2lUIpAINFQWa0f5-qBLUR8QMcjEX5NtCx1pgUU/pubhtml?pli=1#gid=996136743 here]. | |||
<h1>Stance Transitions</h1> | |||
How to get into stance. | |||
{| class="wikitable" | |||
|- | |||
| valign="top" | | |||
{{StanceTable | |||
| rows = | |||
{{StanceRow | input = 3+4 | stance = JAG}} | |||
}} | |||
| valign="top" | | |||
{{StanceTable | |||
| rows = | |||
{{StanceRow | input = f,hcf+2 | stance = GS}} | |||
}} | |||
| valign="top" | | |||
{{StanceTable | |||
| rows = | |||
{{StanceRow | input = f,f,f+2+4 | stance = SW}} | |||
}} | |||
|} | |||
<h1>Punishers</h1> | |||
Use these moves when you have at least a +10 frame advantage to punish your opponent. | |||
{{PunishTable | |||
| rows = | |||
{{PunishRow | frames = 10 | standing = 2,1 | crouching = FC 1}} | |||
{{PunishRow | frames = 11 | standing = 2,1 | crouching = ws 4}} | |||
{{PunishRow | frames = 12 | standing = b+1,2 | crouching = ws 4}} | |||
{{PunishRow | frames = 14 | standing = df+1,2 | crouching = ws 4}} | |||
{{PunishRow | frames = 15 | standing = uf+4 | crouching = FC uf+4}} | |||
}} | |||
<h1>Plus on block moves</h1> | |||
{{MoveCardSimple | |||
|title= | |||
|startup= | |||
|startup-color=white | |||
|hitlevel= | |||
|properties= | |||
|onblock= | |||
|onblock-color= | |||
|onhit= | |||
|onhit-color= | |||
|oncounter= | |||
|oncounter-color= | |||
}} | |||
<h1>Neutral on block moves</h1> | |||
{{MoveCardSimple | |||
|title= | |||
|startup= | |||
|startup-color=white | |||
|hitlevel= | |||
|properties= | |||
|onblock= | |||
|onblock-color= | |||
|onhit= | |||
|onhit-color= | |||
|oncounter= | |||
|oncounter-color= | |||
}} | |||
<h1>Safe on block moves</h1> | |||
{{MoveCardSimple | |||
|title= | |||
|startup= | |||
|startup-color=white | |||
|hitlevel= | |||
|properties= | |||
|onblock= | |||
|onblock-color= | |||
|onhit= | |||
|onhit-color= | |||
|oncounter= | |||
|oncounter-color= | |||
}} | |||
<h1>Unsafe on block moves</h1> | |||
These are moves that can be punished by your opponent if blocked. | |||
<h1>Launch punishable moves</h1> | |||
These are moves where you can be launched by your opponent if blocked. | |||
Latest revision as of 15:33, 2 October 2025
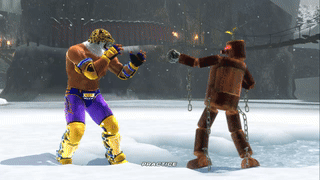
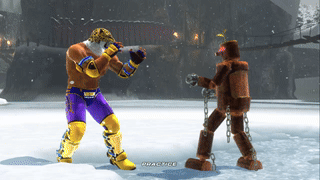
King II

King is a grappler with an amazing throw game with very strong oki and 50/50s but has bad whiff punishment and weak pokes.
Legend
- cd: Crouch Dash
- JAG: Jaguar Step
- GS: Giant Swing
- SW: Shining Wizard
Starter Guide
Key Moves
These are the main moves you will want to use in a match.
[[File:|center|link=]]
| Startup | Hit Level | On Block | On Hit | On Counter |
|---|---|---|---|---|
Stance Moves
This is what you can do out of your stances.
JAG 1
[[File:|center|link=]]
| Startup | Hit Level | On Block | On Hit | On Counter |
|---|---|---|---|---|
JAG 2
[[File:|center|link=]]
| Startup | Hit Level | On Block | On Hit | On Counter |
|---|---|---|---|---|
JAG 3
[[File:|center|link=]]
| Startup | Hit Level | On Block | On Hit | On Counter |
|---|---|---|---|---|
JAG 2+3(1+4)
[[File:|center|link=]]
| Startup | Hit Level | On Block | On Hit | On Counter |
|---|---|---|---|---|
| H |
JAG 4
[[File:|center|link=]]
| Startup | Hit Level | On Block | On Hit | On Counter |
|---|---|---|---|---|
JAG df+4
[[File:|center|link=]]
| Startup | Hit Level | On Block | On Hit | On Counter |
|---|---|---|---|---|
cd 4
[[File:|center|link=]]
| Startup | Hit Level | On Block | On Hit | On Counter |
|---|---|---|---|---|
cd 1+2
[[File:|center|link=]]
| Startup | Hit Level | On Block | On Hit | On Counter |
|---|---|---|---|---|
cd 2+3
[[File:|center|link=]]
| Startup | Hit Level | On Block | On Hit | On Counter |
|---|---|---|---|---|
| H |
Chain grab (Standing Heel Hold)
cd 1+4
[[File:|center|link=]]
| Startup | Hit Level | On Block | On Hit | On Counter |
|---|---|---|---|---|
| H |
Chain grab (Arm Breaker)
Chain Grab Tree
Arm Breaker

AB to Rolling Death Cradle

| Startup | Hit Level | On Block | On Hit | On Counter |
|---|---|---|---|---|
| — | — | — | — | — |
Example of the chain throw route
Reverse Arm Slam

RAS to Muscle Buster
| Startup | Hit Level | On Block | On Hit | On Counter |
|---|---|---|---|---|
| — | — | — | — | — |
Example of the chain throw route
Standing Heel Hold

SHH to Kings Bridge
| Startup | Hit Level | On Block | On Hit | On Counter |
|---|---|---|---|---|
| — | — | — | — | — |
Example of the chain throw route
Cobra Clutch

CC to Screwdriver
[[File:|center|link=]]
| Startup | Hit Level | On Block | On Hit | On Counter |
|---|---|---|---|---|
| — | — | — | — | — |
Example of the chain throw route
Reverse Special Stretch Bomb

RSSB to Giant Swing
[[File:|center|link=]]
| Startup | Hit Level | On Block | On Hit | On Counter |
|---|---|---|---|---|
| — | — | — | — | — |
Example of the chain throw route
Extras & Extensions

Combos
Combo resources can be found here.
Stance Transitions
How to get into stance.
|
|
|
Punishers
Use these moves when you have at least a +10 frame advantage to punish your opponent.
| Frames | Standing | Crouching |
|---|---|---|
| 10 | 2,1 | FC 1 |
| 11 | 2,1 | ws 4 |
| 12 | b+1,2 | ws 4 |
| 14 | df+1,2 | ws 4 |
| 15 | uf+4 | FC uf+4 |
Plus on block moves
| Startup | Hit Level | Properties | On Block | On Hit | On Counter |
|---|---|---|---|---|---|
Neutral on block moves
| Startup | Hit Level | Properties | On Block | On Hit | On Counter |
|---|---|---|---|---|---|
Safe on block moves
| Startup | Hit Level | Properties | On Block | On Hit | On Counter |
|---|---|---|---|---|---|
Unsafe on block moves
These are moves that can be punished by your opponent if blocked.
Launch punishable moves
These are moves where you can be launched by your opponent if blocked.